Gluten-free bread: a work in progress
So for the last few weeks I’ve been attempting to make a decent, all-purpose, gluten-free loaf of bread at home. I’ve cut way back on the amount of bread products I eat since going gluten-free, but I still like to have the occasional piece of toast or sandwich. Especially since I don’t have access to a kitchen at work, and some days I don’t have time to cook myself something for lunch before leaving for work. But buying bread has gotten a little silly – 6 to 10 dollars per loaf? Ouch. I know the ingredients are expensive, but I also know I can do much better baking my own, at least in terms of cost.

I’ve had some interesting experiments with baking bread, that’s for sure. My first loaf was made with far too much batter, so about half way through the rising process I had to dump it into a much larger container. Then, when it was finished baking, it was too wide, so I ended up with very wide, not very tall slices of bread. It also stuck to the pan like crazy, so you can imagine how useful those actual slices of bread were!
My second loaf was, err, completely made of fail. I bought potato flour instead of potato starch, thinking that I had used potato flour the first time, so it must be the correct product. But the problem lies in the labeling – Club House labels their product as potato flour when it is actually potato starch, and that’s what I bought the first time. Bob’s Red Mill, however, has correct labeling, so long-story-short, I used potato flour in my bread a few days ago. When mixing, the batter was a sticky, thick mess, and I needed to add at least a cup of water to make it usable. It barely rose at all and you can well imagine how dense the resulting loaves of bread were! I ended up taking those to the park for the birds, squirrels and raccoons to munch on.
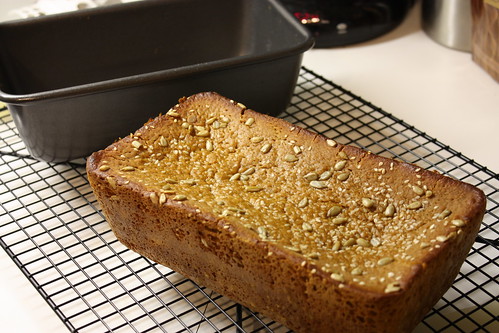
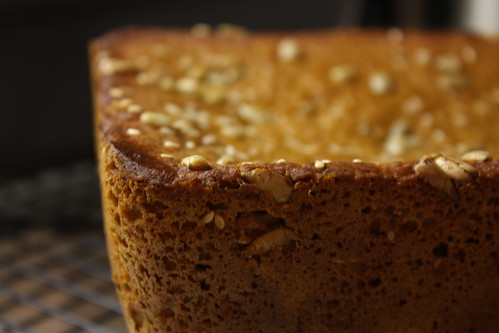
Today’s bread turned out a lot better. I had my potato starch. I had my other flours. My liquid-to-dry ratio seemed about right, although in retrospect I probably could have used a bit more flour in the recipe, so keep that in mind if you decide to try making this on your own. Maybe add another 3 or 4 tablespoons of starch? You’ll also notice my bread fell in the middle. This is something I’m working on, but it’s a common problem for gluten-free bakers. I’ve linked to two great posts with lots of gluten-free bread baking tips at the end of this post; if you follow those tips, you might prevent your loaf from falling.
And the taste? Quite good! Similar to a basic white bread, good for sandwiches or just with some butter (or in my case, Earth Balance ‘buttery spread’).
Your basic Gluten-free loaf
Inspiration from this recipe by Gluten-free vegan, but I’ve tweaked the recipe a bit.
Dry ingredients:
1 cup potato starch
2/3 cup brown rice flour
2/3 cup chick pea flour (also called besan)
1/3 cup + 2 Tablespoons corn starch
1/2 teaspoon salt
Wet ingredients:
1 1/3 cups warm water (‘wrist temperature’ – just warm enough to get the yeast going)
1 Tablespoon blackstrap molasses
2 Tablespoons sunflower oil
1 teaspoon yeast
Additions: Nuts or seeds for the top. Good choices include sunflower seeds and sesame seeds, like I’ve used, but you can use whatever you like.
In a small bowl, mix together the water and molasses. Add the yeast and let stand for 10 minutes. While the yeast is doing its thing, get out a large bowl and whisk together all the dry ingredients.
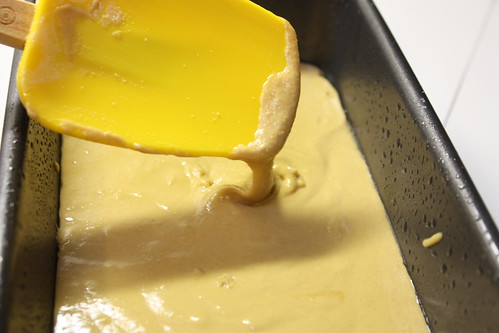
Once the yeast looks frothy, add the sunflower oil to the wet ingredients and then stir that into the dry ingredients. Your dough should actually be a thick, cake-batter-like consistency. If you need to add a little more flour or starch, add it a tablespoon at a time and mix in completely, until you’ve got the consistency you need. It should look close to this – maybe even a little thicker:
Pour the batter into a lightly-greased bread loaf pan. If you like, sprinkle the top of your loaf with some nuts or seeds. Then cover lightly and place in a warm spot to rise for 1-1.5 hours, until doubled in size.
When ready to bake, preheat your oven to 350F. Cover the pan with some aluminum foil, then bake in the centre of the oven for 1 hour. After 1 hour, remove the foil and continue to bake for 10 minutes or so, just until the top has browned.
Let the bread cool in the pan for 10 minutes, then remove onto a cooling rack. It’s best to let it cool completely before eating, but I know it’s hard to resist freshly baked bread.
Makes one loaf.
Good tips for gluten-free bread makers from some of my favourite blogs: