Daring Cooks February: Mmm, Mezze!
So, I’ve hung up my Daring Bakers apron. It became too time consuming to be converting elaborate recipes containing a lot of eggs and butter into vegan, gluten-free versions. Maybe some day I’ll go back, but for now, I simply don’t have the energy to do it. However, I know I can convert cooking recipes; I do it every day! And so I’ve put on an apron for the Daring Cooks.
The 2010 February Daring Cooks challenge was hosted by Michele of Veggie Num Nums. Michele chose to challenge everyone to make mezze based on various recipes from Claudia Roden, Jeffrey Alford and Naomi Dugid.
So mezze. I love small plates and I love mezze, even if the trend is getting a bit old at restaurants here in Toronto. But at home, I think it’s a great idea for a party. Unfortunately, we had no event to have a party for, so instead I just made this month’s challenge just because I could.
We were required to make pita bread from scratch, and hummus from the recipe Michele found. Other than that, we could make whatever else we wanted for our mezze table. I opted to go the slightly easy route: a gluten-free pita, hummus, and falafel (also gluten-free). Everything was already vegan, so I didn’t have to worry about that end of things.
The pita was the real challenge for me. The original recipe was of course filled with gluten, so I had to get creative and figure out how to make a good flatbread that would go well with hummus. I searched around for a recipe that caught my eye and found this one, which was apparently adapted from the book The Gluten-Free Gourmet Bakes Bread by Bette Hagman. After playing with the ingredients a bit to make sure they were vegan and used what I could find the day I wanted to make my pita, I set out pouring my flours, mixing my dough, and, well, hoping! My pita turned out decent but not as good as they could have. It didn’t rise much, which isn’t a huge surprise, but I think next time I might add a bit more yeast to give it more rise. They also didn’t have pockets, which is also no surprise. Fresh out of the oven, it was a bit too chewy and dense, although it did have good flavour. The next day, it was actually better, which does not surprise me much, as I’ve found most gluten-free, vegan baked goods need to cool completely so their texture will ‘develop’. I think next time I might try some flax+water to replace some of the egg whites and maybe add some agar instead of just adding in extra xanthan to replace the gelatin.

Gluten-Free Pita – Adapted from Gluten-free Gastronaut
This recipe makes 9, 6-inch pitas.
Dry ingredients:
1/2 cup quinoa flour
1/4 cup sorghum flour
3/4 cup rice flour
1 1/4 cups tapioca starch
3 tablespoons almond meal
3/4 teaspoon salt
4 1/4 tablespoons sugar
2 tablespoons xanthan gum
1 tablespoon egg replacer
Wet ingredients:
4 teaspoons dry yeast
3/4 cup warm water
1 teaspoon agave
3 tablespoons earth balance (vegan margarine)
1/4 cup plus 2 tablespoons hot water
egg replacer for 3 egg whites (depends on the brand, check your box)
Take 2 large cookie sheets and grease them well, or cover them with silicone baking mats. Set aside.
Mix your dry ingredients in a mixer with the paddle attachment. If you don’t have a mixer, you can do this by hand – just take a whisk and mix everything together really well.
Dissolve the yeast in warm water with the sugar. While your yeast is getting frothy, put the hot water in a small bowl and drop in the Earth Balance, stirring to make sure it melts.
Pour both the yeast mixture and the Earth Balance mixture into the bowl with your dry ingredients, and then turn your mixer to medium-high. Beat for 3 minutes. If you’re doing this by hand, just take a wooden spoon and mix well until everything seems blended. This will probably take a good 5 minutes – you need to give the xanthan gum time to do its thing.
Grease your hand with a little Earth Balance or plain tasting oil (such as canola or sunflower). Make balls of dough slightly larger than an egg and then pat them down onto your prepared pans. You want to end up with dough rounds that are about 6-inches in diameter and about a 1/4 inch thick. Keep going until all your dough is used up; you should get about 9 pitas. Leave the pans in a warm place to rise for an hour or so, until about 50% higher.
Preheat your oven to 500C. Once fully heated, bake your pitas for 5 minutes or so, watching carefully to make sure they do not burn.
For best taste, let them cool completely before eating, but they’re fine eaten right away if you like.
The hummus recipe was good, but I have to admit I prefer my own recipe. This one is very lemon-y.
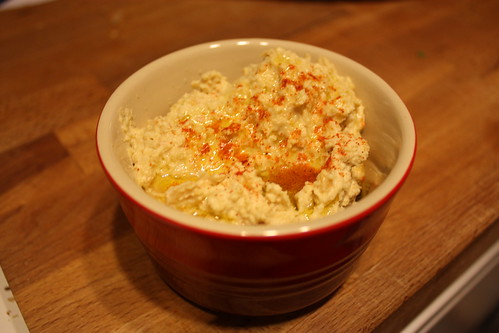
Hummus – Recipe adapted from The New Book of Middle Eastern Food by Claudia Roden
Prep Time: Hummus can be made in about 15 minutes once the beans are cooked. If you’re using dried beans you need to soak them overnight and then cook them the next day which takes about 90 minutes.
1.5 cups dried chickpeas, soaked in cold water overnight (or substitute well drained canned chickpeas and omit the cooking) (10 ounces/301 grams)
2-2.5 lemons, juiced (3 ounces/89ml)
2-3 garlic cloves, peeled and crushed
a big pinch of salt
4 tablespoons tahini (sesame paste) OR use peanut butter or any other nut butter—feel free to experiment) (1.5 ounces/45 grams)
additional flavorings (optional) I would use about 1/3 cup or a few ounces to start, and add more to taste
Directions:
1. Drain and boil the soaked chickpeas in fresh water for about 1 ½ hours, or until tender. Drain, but reserve the cooking liquid.
2. Puree the beans in a food processor (or you can use a potato masher) adding the cooking water as needed until you have a smooth paste.
3. Add the rest of the ingredients and mix well. Adjust the seasonings to taste.
And last, the falafel. It was easy to make these gluten-free by simply using chickpea flour instead of all-purpose. They turned out really great, although I do recommend having a large food processor to make it. Mine couldn’t keep up with all the dry ingredients it needed to chop. Also, I think next time I’ll half the amount of onion – this was too strong for me. But they were delicious otherwise, and not too difficult to make – try it some time!
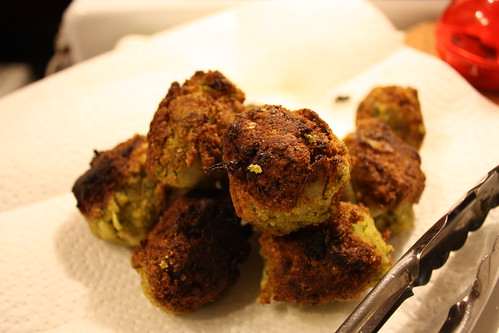
Falafels – Recipe from Joan Nathan and Epicurious.com
Prep Time: Overnight for dry beans and 1 hour to make Falafels
1 cup dried chickpeas, soaked in cold water overnight OR use well canned drained chickpeas (7 ounces/100 grams)
1/2 large onion (roughly chopped, about 1 cup)
2 tablespoons fresh parsley, chopped OR use a couple pinches of dried parsley (.2 ounces/5 grams)
2 tablespoons fresh cilantro, chopped OR use a couple pinches of dried cilantro (.2 ounces/5 grams)
1 teaspoon table salt (.1 ounce/5 grams)
1 teaspoon dried hot red peppers (cayenne) (.1 ounce/2 grams)
4 whole garlic cloves, peeled
1 teaspoon cumin (.1 ounce/2 grams)
1 teaspoon baking powder (.13 ounces/4 grams)
4 tablespoons all-purpose flour (1 ounce/24 grams) (you may need a bit extra) *** I used chickpea flour instead to make this gluten-free!
tasteless oil for frying (vegetable, canola, peanut, soybean, etc.), you will need enough so that the oil is three inches deep in whatever pan you are using for frying
Directions:
1. Put the chickpeas in a large bowl and add enough cold water to cover them by at least 2 inches. Let soak overnight, and then drain. Or use canned chickpeas, drained.
2. Place the drained, uncooked chickpeas and the onions in the bowl of a food processor fitted with a steel blade. Add the parsley, cilantro, salt, hot pepper, garlic, and cumin. Process until blended but not pureed. If you don’t have a food processor, then feel free to mash this up as smooth as possible by hand.
3. Sprinkle in the baking powder and 4 tablespoons of the flour, and pulse. You want to add enough bulgur or flour so that the dough forms a small ball and no longer sticks to your hands. Turn into a bowl and refrigerate, covered, for several hours.
4. Form the chickpea mixture into balls about the size of walnuts.
5. Heat 3 inches of oil to 375 degrees (190C) in a deep pot or wok and fry 1 ball to test. If it falls apart, add a little flour. Then fry about 6 balls at once for a few minutes on each side, or until golden brown.
6. Drain on paper towels.